Article
How To Run A Beta Program With Released
Get up and running in less than 10 minutes


Running a beta program? Released makes it easy to keep things organized, communicate clearly, and capture feedback without adding overhead.
Here’s how we recommend setting it up:
Create a workspace for your beta
Start by creating a dedicated workspace for your beta users.
A workspace in Released comes with a changelog, a roadmap and the ability to collect feedback scoped to the workspace. Setting up a new workspace takes less than 30 seconds.
Select a name for your workspace (which will also be the name of the public portal that's visible to your customers
Select the Jira projects containing the work items related to beta
Click "Create workspace".
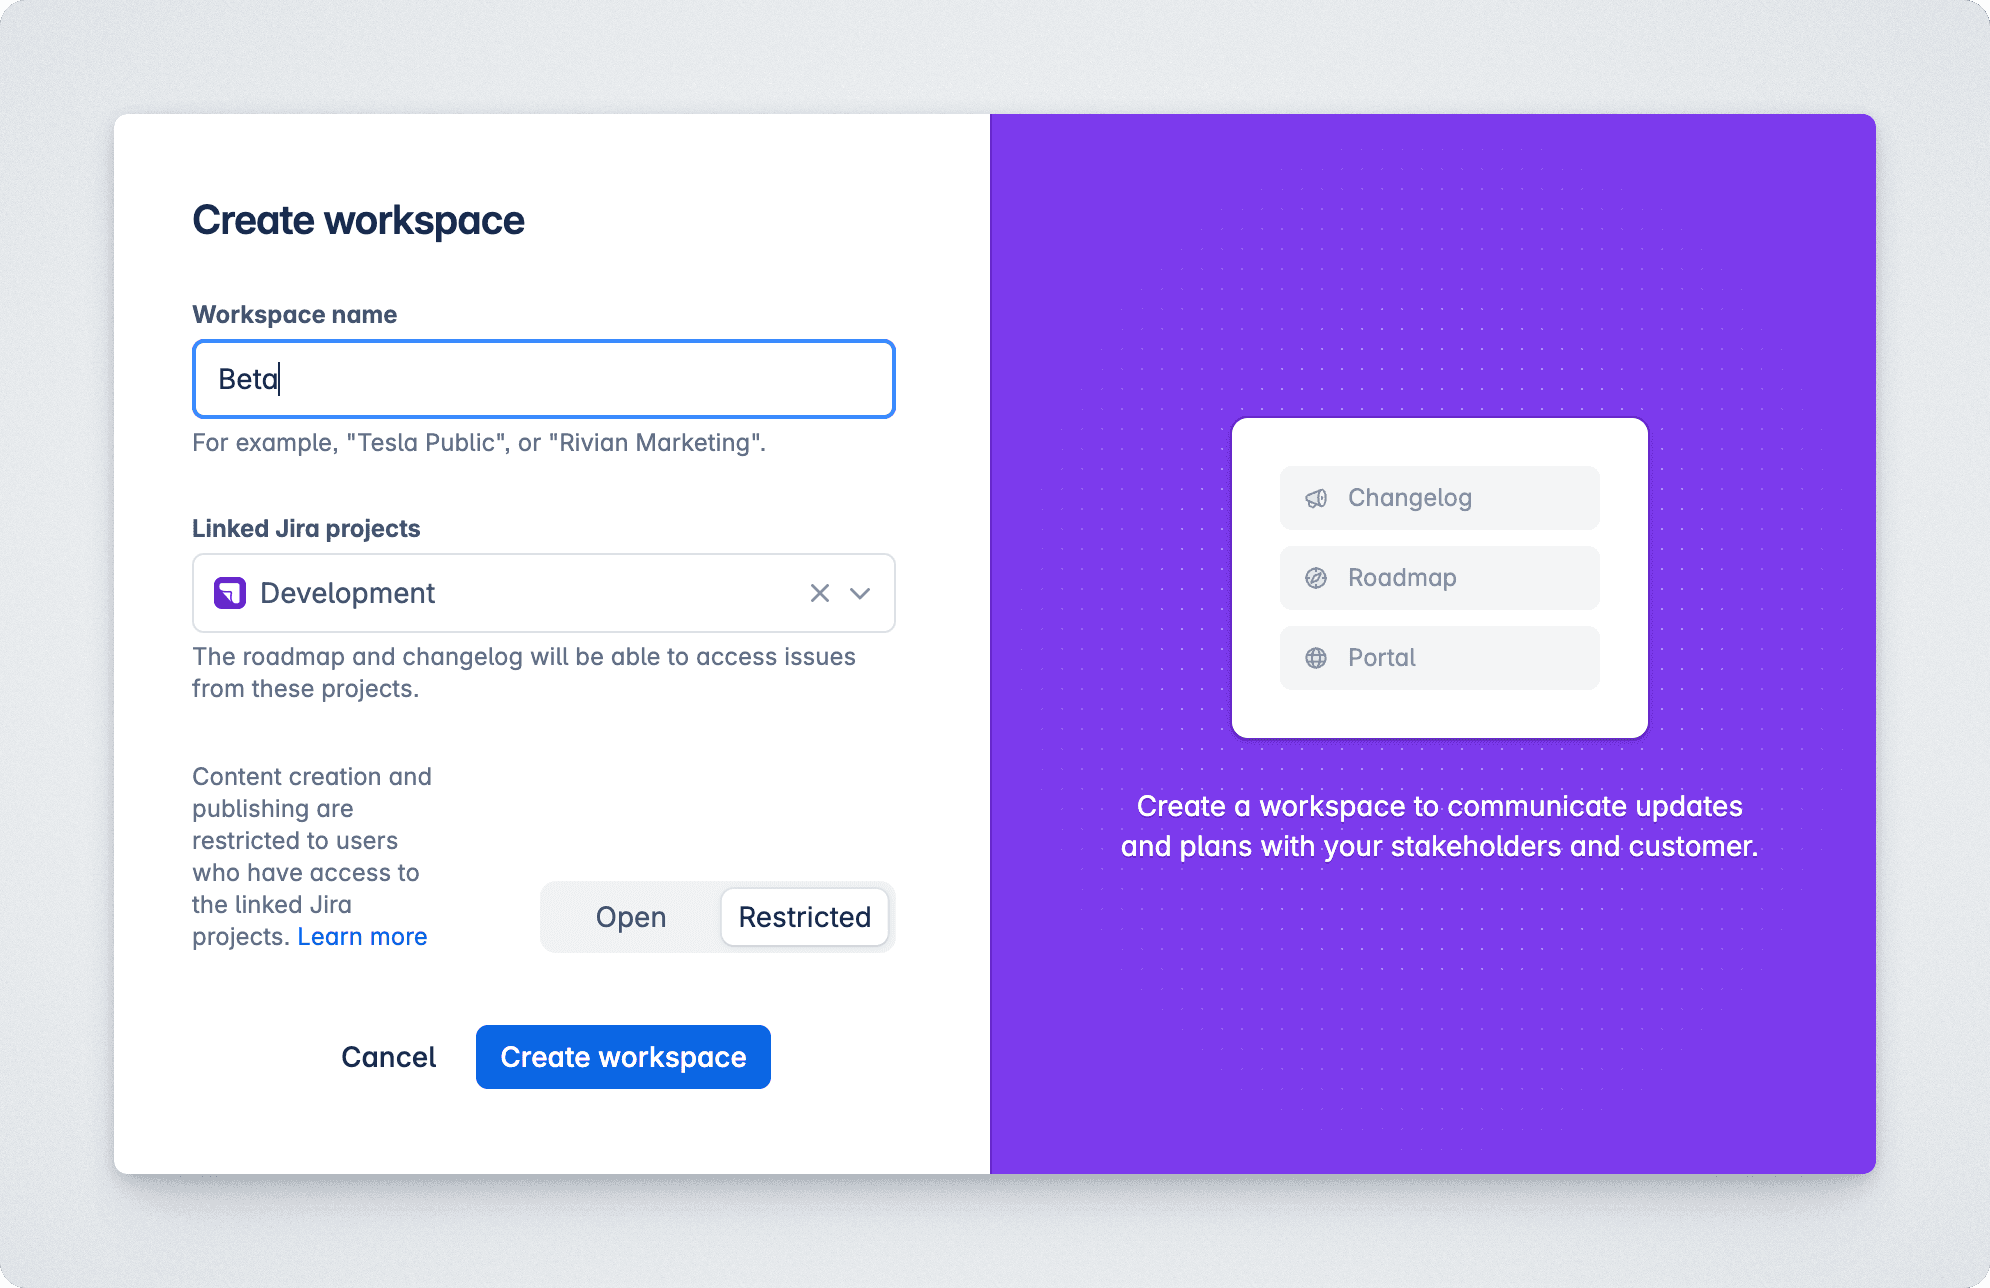
Restrict access
If you’re running a private beta, you might want to control who can see the portal. To do that, simply set the portal access level to Restricted.
Once restricted, you can choose who gets access. You can invite specific individuals by email, or allow entire companies by whitelisting their email domains.

Create a beta-specific roadmap view
Create a new roadmap in your workspace. We recommend using the Board view over the Timeline to avoid setting expectations around exact dates.
The default columns — Under Consideration, Planned, In Development — are a solid starting point, but you can customize them to match your workflow.
Use filters to show only the features you’re actively testing or planning to release during the beta. This gives users a focused view of what’s coming.
In Display Options, choose which work item fields to share. Keep it minimal to avoid overwhelming your users with too much detail.
Share the portal
Once your roadmap is set up, it’s time to share it with your beta users.
Start by writing a short introduction at the top of the page. Explain what the beta covers, how users can leave feedback, and where to look for the latest changes. Keep it friendly and to the point, you’re setting the tone for how people engage with the program.
You can also add labels or custom groups to highlight areas where you’re actively looking for input. This helps guide attention without needing long explanations.
If you’re collecting feedback on specific features, consider linking directly to those items in your invitation message. The less clicking around, the better.
Collect feedback
Users can leave feedback directly on roadmap items. Every piece of feedback is automatically connected to the relevant Jira issue behind the scenes, so your team sees everything in context.

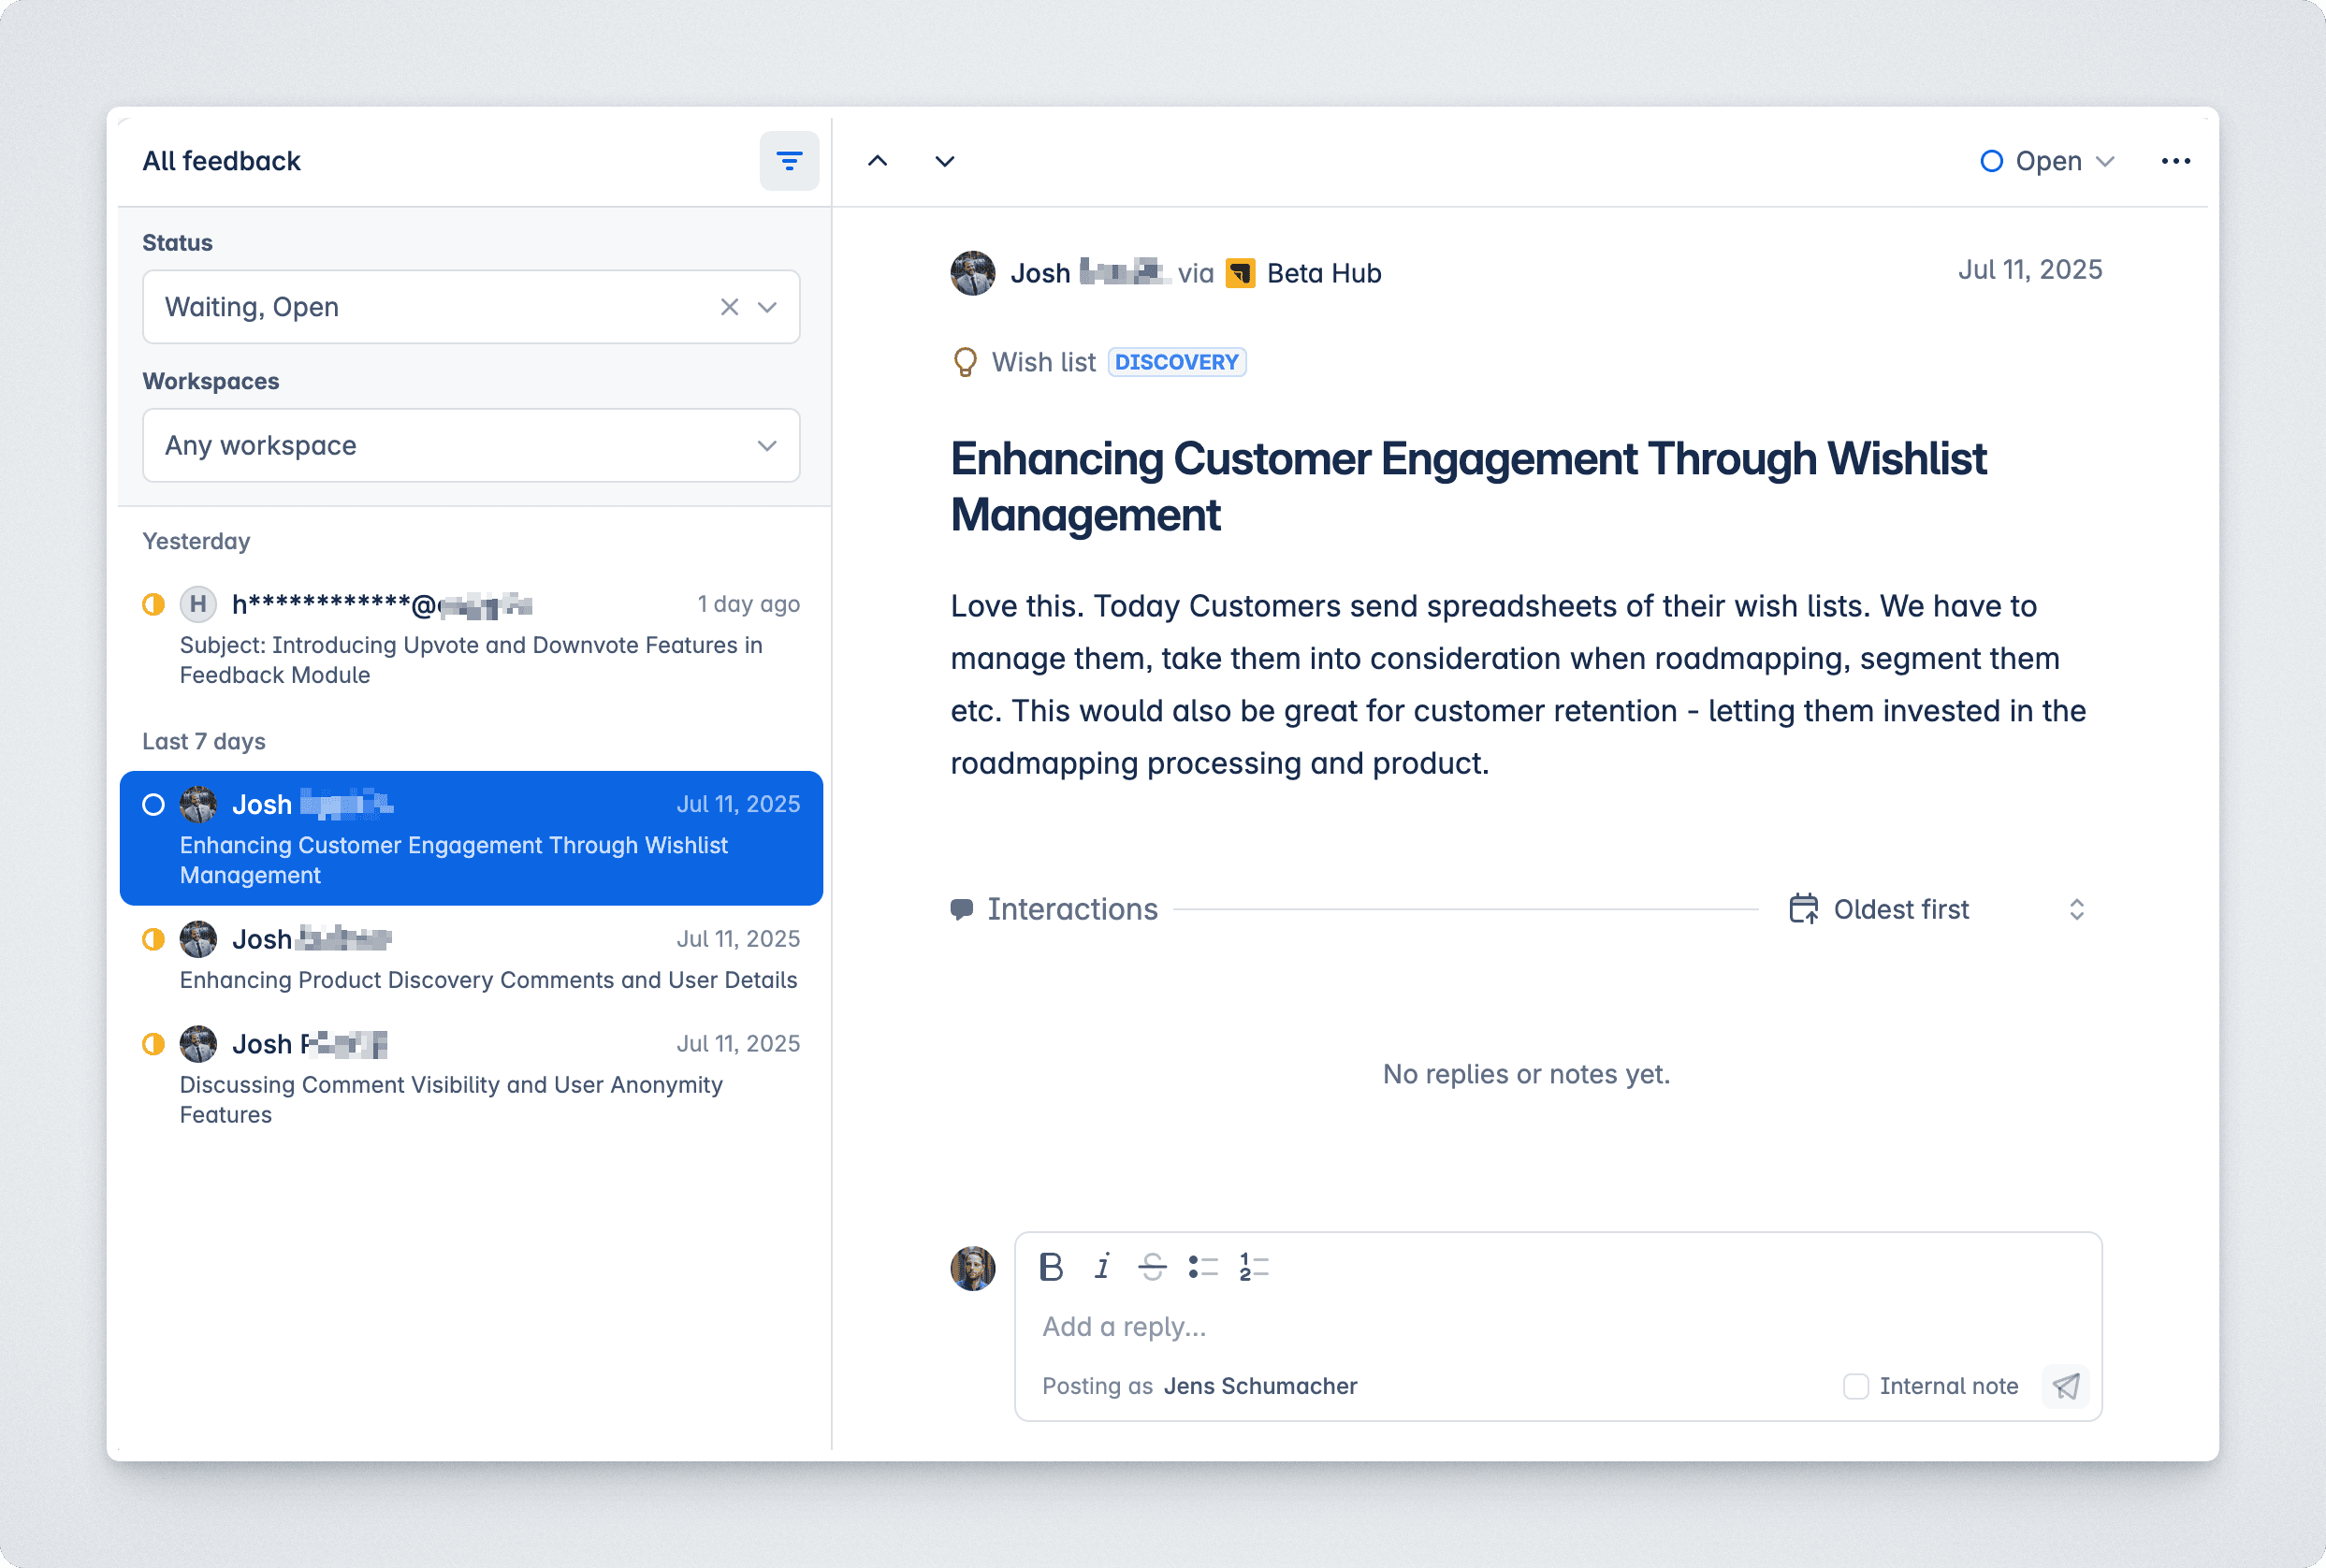
Stay on top of feedback
As feedback comes in, head to the Inbox to review and respond. You can filter the view to only show feedback from your beta workspace, so it’s easy to stay focused.
Each message has a status to help you track progress. When you reply, the status automatically changes to Waiting. If no follow-up is needed, you can mark it as Closed. This keeps your team aligned and ensures nothing gets missed.
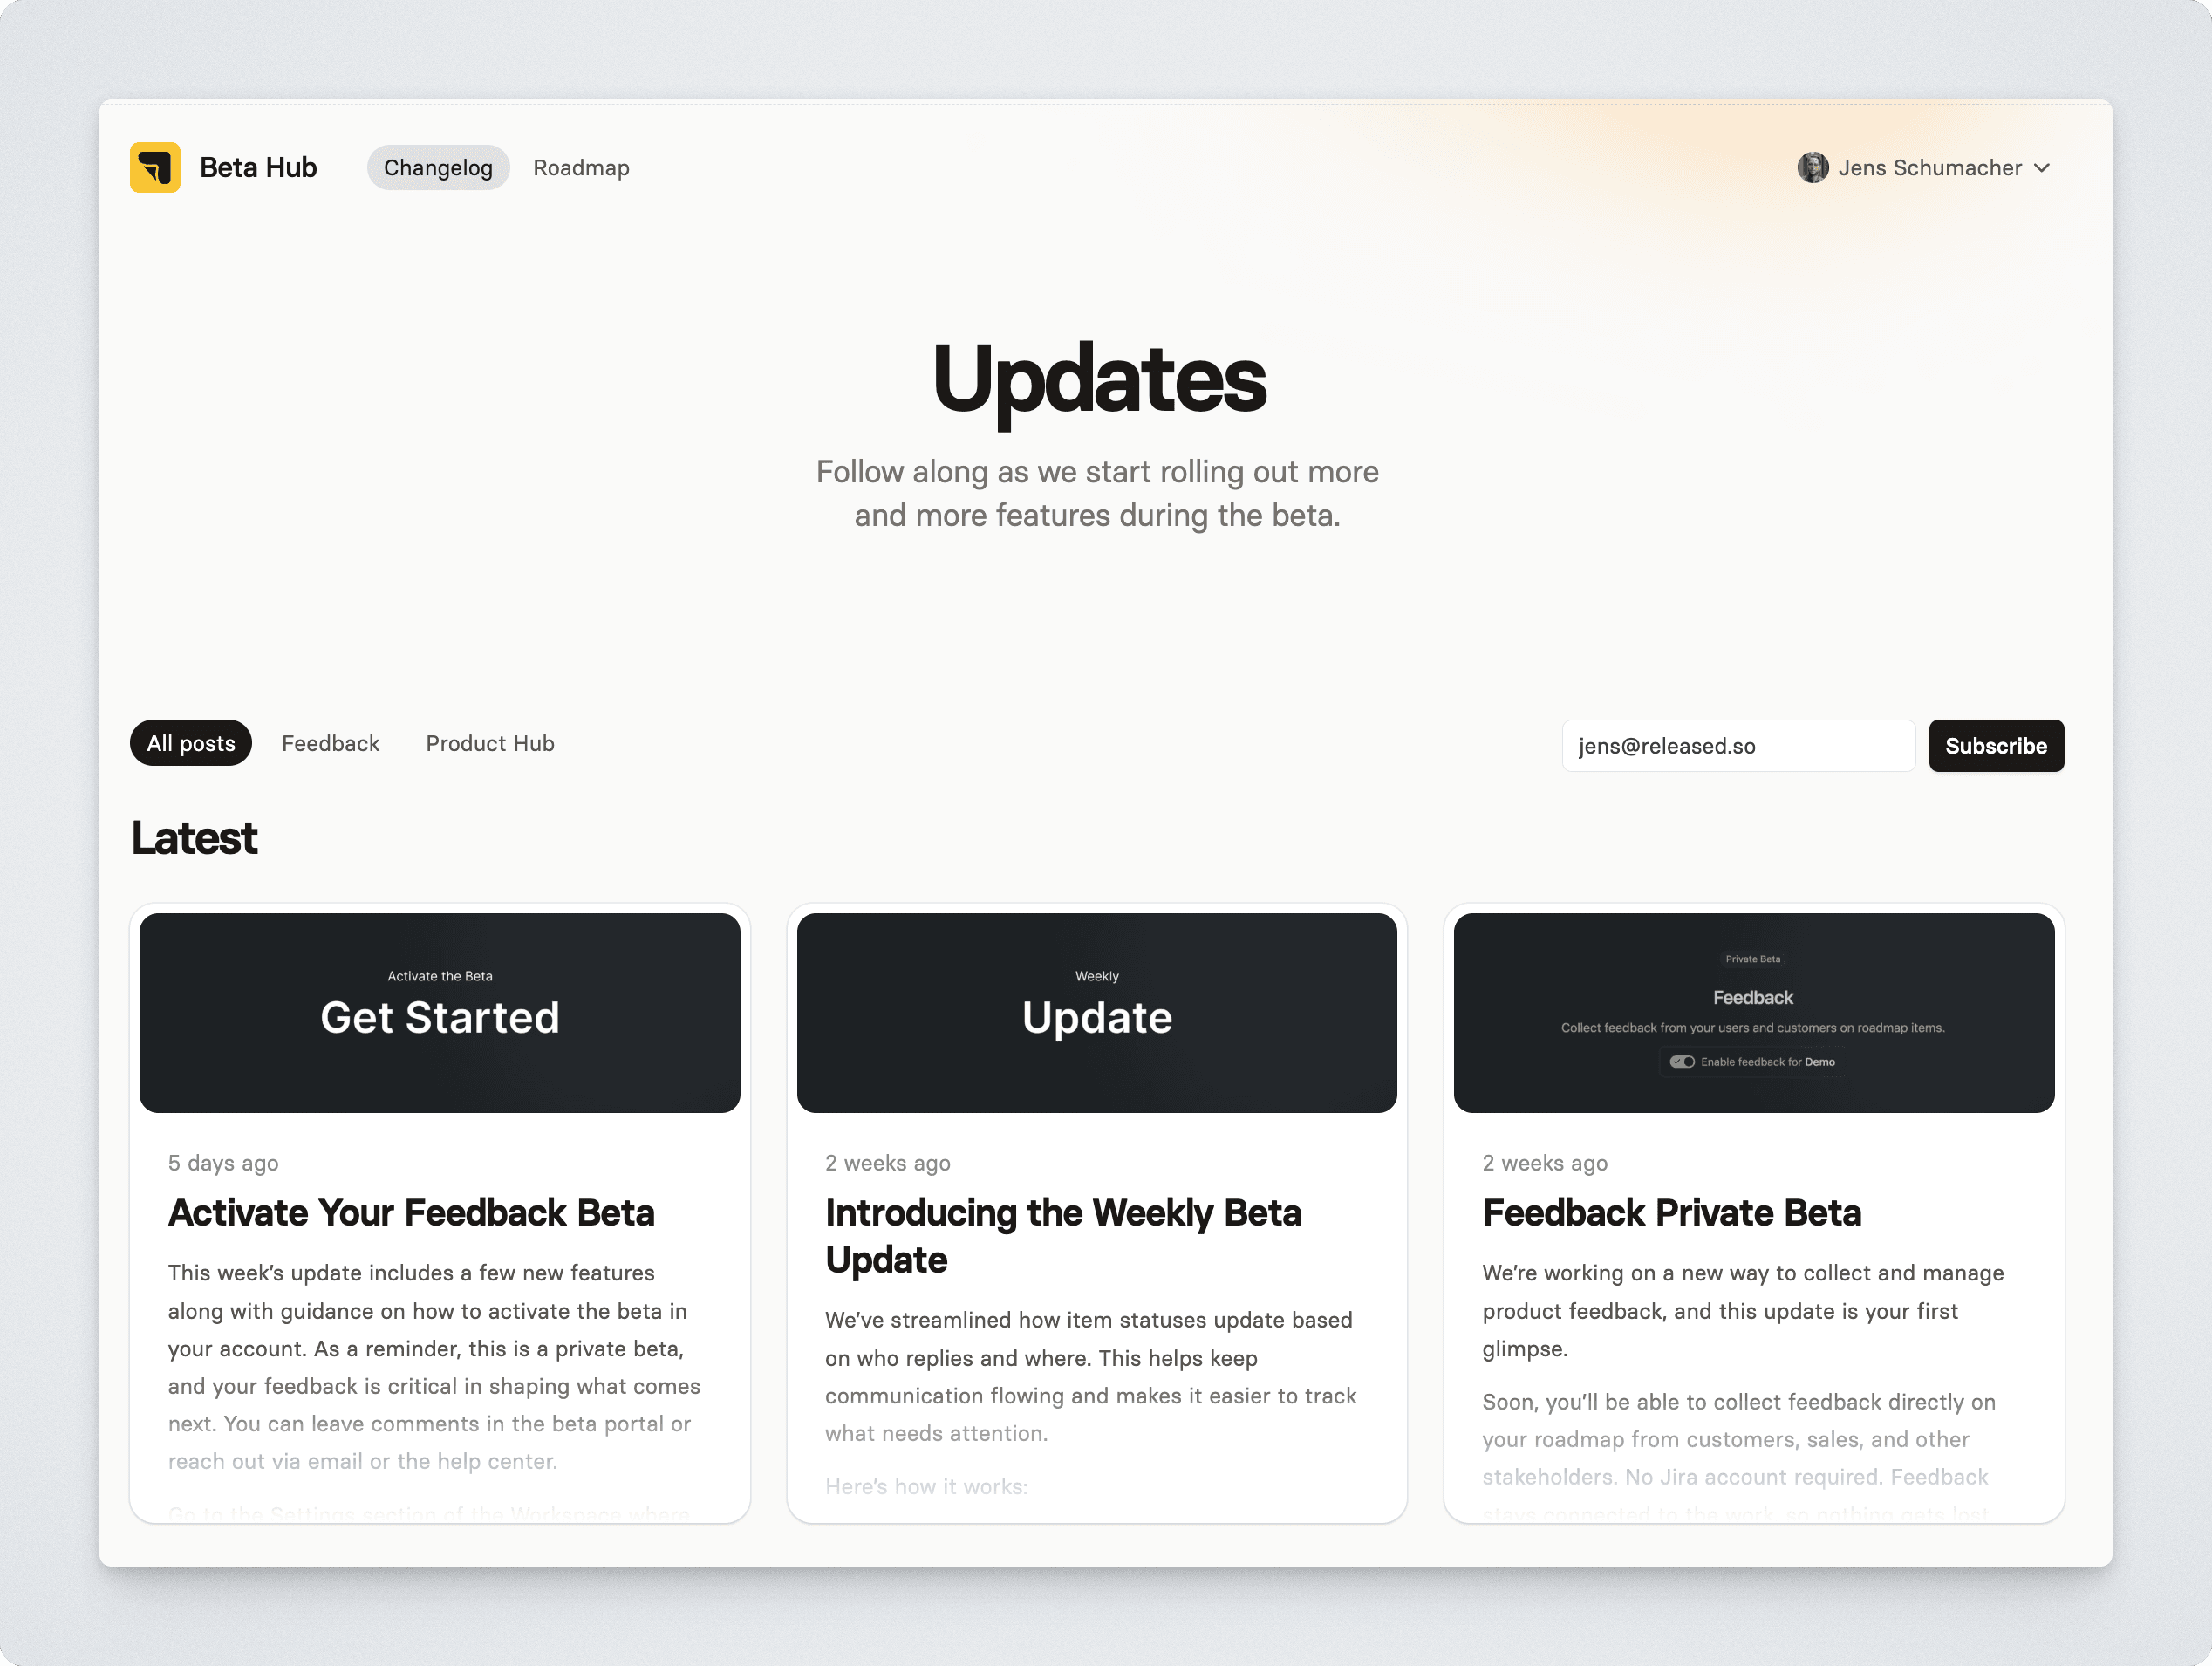
Close the loop
When something ships, publish a release note. Beta users will see the changelog on your portal, and you can notify them with one click. It’s a simple way to keep people in the loop and show them their input made a difference.
Summary
That’s all you need to run a simple, effective beta program with Released. You’ll keep users in the loop, capture feedback where it matters, and stay tightly connected to your Jira workflow — without extra tools or manual updates. If you're not already set up, it only takes a few minutes to get started.
Article
How To Run A Beta Program With Released
Get up and running in less than 10 minutes
Running a beta program? Released makes it easy to keep things organized, communicate clearly, and capture feedback without adding overhead.
Here’s how we recommend setting it up:
Create a workspace for your beta
Start by creating a dedicated workspace for your beta users.
A workspace in Released comes with a changelog, a roadmap and the ability to collect feedback scoped to the workspace. Setting up a new workspace takes less than 30 seconds.
Select a name for your workspace (which will also be the name of the public portal that's visible to your customers
Select the Jira projects containing the work items related to beta
Click "Create workspace".
Restrict access
If you’re running a private beta, you might want to control who can see the portal. To do that, simply set the portal access level to Restricted.
Once restricted, you can choose who gets access. You can invite specific individuals by email, or allow entire companies by whitelisting their email domains.
Create a beta-specific roadmap view
Create a new roadmap in your workspace. We recommend using the Board view over the Timeline to avoid setting expectations around exact dates.
The default columns — Under Consideration, Planned, In Development — are a solid starting point, but you can customize them to match your workflow.
Use filters to show only the features you’re actively testing or planning to release during the beta. This gives users a focused view of what’s coming.
In Display Options, choose which work item fields to share. Keep it minimal to avoid overwhelming your users with too much detail.
Share the portal
Once your roadmap is set up, it’s time to share it with your beta users.
Start by writing a short introduction at the top of the page. Explain what the beta covers, how users can leave feedback, and where to look for the latest changes. Keep it friendly and to the point, you’re setting the tone for how people engage with the program.
You can also add labels or custom groups to highlight areas where you’re actively looking for input. This helps guide attention without needing long explanations.
If you’re collecting feedback on specific features, consider linking directly to those items in your invitation message. The less clicking around, the better.
Collect feedback
Users can leave feedback directly on roadmap items. Every piece of feedback is automatically connected to the relevant Jira issue behind the scenes, so your team sees everything in context.
Stay on top of feedback
As feedback comes in, head to the Inbox to review and respond. You can filter the view to only show feedback from your beta workspace, so it’s easy to stay focused.
Each message has a status to help you track progress. When you reply, the status automatically changes to Waiting. If no follow-up is needed, you can mark it as Closed. This keeps your team aligned and ensures nothing gets missed.
Close the loop
When something ships, publish a release note. Beta users will see the changelog on your portal, and you can notify them with one click. It’s a simple way to keep people in the loop and show them their input made a difference.
Summary
That’s all you need to run a simple, effective beta program with Released. You’ll keep users in the loop, capture feedback where it matters, and stay tightly connected to your Jira workflow — without extra tools or manual updates. If you're not already set up, it only takes a few minutes to get started.
Use cases
Resources
Backed by


Use cases
Backed by
Use cases
Resources
Backed by